
Hello, winter wanderers and curious kiddos!
As the winter season gears up here in the Midwest, the plunging mercury brings more than just a drop in temperature; it unlocks a playground for cool winter science experiments.
Whether you’re watching ice crystals form on your window or marveling at how quickly hot water turns to mist in the cold air, the frigid months are ripe with opportunities for discovery.
On those days when the wind chill bites a little too fiercely or a snowstorm keeps you huddled inside, fend off cabin fever with these fun winter science experiments.
From creating a frozen bubble to crafting crystal snowflakes, there’s a world of easy science experiments waiting right outside your frost-tipped door.
So pull on your mittens and let’s turn this winter wonderland into a spectacular science lab!
1. Maple Syrup Snow Candy
When Jack Frost is nipping at your nose, it’s the perfect time to whip up a batch of Maple Syrup Snow Candy. Not only is it a tasty treat, but it’s a fantastic science lesson packed into each delicious bite. Here’s how to make your own winter wonderland confection while exploring the concepts of freezing point depression and crystallization.
What You’ll Need:
- Fresh, clean snow
- 100% pure maple syrup
- A medium saucepan
- A candy thermometer (optional but helpful)
- Popsicle sticks or forks (for holding the candy)
Instructions:
- Prep Your Snow: First things first, find a spot where the snow is clean and untouched. Pack the snow into a shallow pan or tray to create a dense, even layer. This will be your candy mold.
- Boil the Maple Syrup: Pour maple syrup into your saucepan and heat it over medium-high heat. If you’re using a candy thermometer, you’ll want to heat the syrup to about 235°F (112°C) — that’s the “soft ball” stage in candy-making terms.
- Candy Science: Explain to your little helpers that heating the syrup to this temperature causes water to evaporate, making the syrup super-saturated with sugar. This is important for the crystallization process.
- Cooling Phase: Once your syrup reaches the soft ball stage, take it off the heat and let it cool for a moment. It should be less bubbly and slightly thicker.
- Pour Over Snow: Now for the fun part! Carefully drizzle the hot syrup in lines or shapes over the packed snow. Kids can watch as the syrup hits the snow and starts to harden. This is freezing point depression in action — the syrup freezes at a lower temperature because of its sugar content.
- Science in Action: As the syrup hardens, it forms into a candy state. This demonstrates crystallization, where the sugar molecules arrange into a solid crystal structure.
- Candy On a Stick: After a minute or two, when the syrup ribbons have hardened but are still slightly warm, gently press a popsicle stick or fork into one end of each candy ribbon. Twist it a bit to ensure it sticks.
- Enjoy Your Treat: Now it’s time to taste your creation! Lift the candy ribbons out of the snow and enjoy. Your maple syrup snow candy should be a chewy, taffy-like consistency if done right.
And there you have it! A simple and sweet science experiment that you can eat! Who knew science could be so deliciously fun? Don’t forget to ask your kids what they learned and share any interesting observations. Maybe they noticed how fast the syrup cooled or how the candy’s texture changed. Every observation is a sweet step toward learning more about the science of sugar.
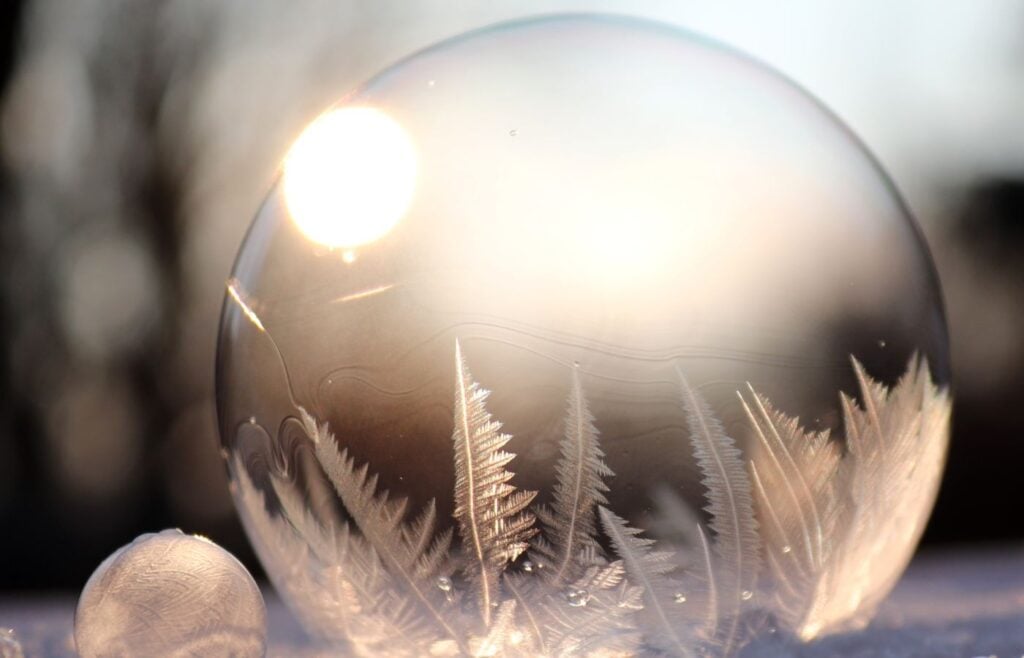
2. Frozen Bubbles
Winter weather brings with it a unique chance to transform ordinary soap bubbles into shimmering, crystalline spectacles.
This easy science experiment is a fun way to demonstrate the effects of freezing temperatures on the liquid state, and it’s perfect for young children and the young at heart. Here’s how you can enjoy this simple experiment with a touch of winter magic.
What You’ll Need:
- A bubble solution (homemade or store-bought)
- A bubble wand or plastic straw
- Cold temperatures, ideally below 32 degrees Fahrenheit
- A calm day with little wind
Instructions:
- Wait for a Snow Storm (or Just a Really Cold Day): This experiment works best when the mercury dips into the subzero temperatures. Check with a local meteorologist, like Eric Holthaus, or a reliable weather service to find the perfect day.
- Prepare Your Bubble Solution: For best results, mix your bubble solution with a bit of cold water. Some say that a solution warmed slightly above icy water creates more durable bubbles, but experimentation is key. If you’re up for it, try both warm and cold mixtures to see which works better in the colder air.
- Step Outside: Bundle up and take your bubble solution and wand outside. If there’s fresh snow, it can be a beautiful backdrop for your frozen orbs.
- Blow Your Bubbles: Dip the end of your bubble wand or plastic straw into the solution. Find an area where the cold air is still, and gently blow a bubble.
- Observe the Magic: Watch as the bubble begins to freeze, starting from the bottom where it’s in contact with the colder air, creating a chain reaction of ice crystal formation. It’s a live science show right before your eyes!
- Capture the Moment: These delicate orbs won’t last long, so have your camera ready. If you’re quick, you can snap a photo or make a YouTube video to share on social media.
- Science Behind the Fun: Discuss with your kids or your readers the science at play. Talk about how extreme cold speeds up the freezing process, turning water droplets into solid ice crystals, and how the soap creates a flexible surface for the water to freeze on, demonstrating the volume of a gas trapped in a liquid state.
- Safety Tip: Remind everyone that while frozen bubbles are fun, it’s important to be safe in cold weather experiments. Stay warm, and don’t let your tongue freeze to a bubble wand!
- Fun Fact: Share a cool science tidbit from experts like Mark Seeley from the University of Minnesota, who might explain that the bubbles freeze due to the high thermal conductivity of the metal pole, or whatever tool you’re using to blow bubbles.
- Experiment Further: If you’re feeling adventurous, try adding food coloring to the bubble solution to create colorful ice bubbles, or see how the bubbles form on different surfaces like a plastic bag or a cup of water.
3. Ice Magnifying Glass
Uncover the marvels of light and lenses with this classic science experiment. Creating an ice magnifying glass is a captivating demonstration of light refraction and lens effects. Let’s dive into this cool experiment!
What You’ll Need:
- A small, round plastic container (like a bowl or a dish)
- Distilled water (to help create clearer ice)
- Freezer
- A small object or text to magnify
- A sunny day or a flashlight
Instructions:
- Boil the Water: Start by boiling water to remove impurities and air bubbles, which will help make your ice as clear as possible. Let it cool to room temperature first before freezing.
- Prepare the Container: Choose a container that has a smooth, round bottom. The shape is important as it will become the ‘lens’ of your magnifying glass.
- Freeze Your Lens: Fill the container with the cooled boiled water and place it in the freezer. If you want to speed up the process, a tip is to place it at the end of the string of your freezer items where the air is coldest.
- Unmolding Your Ice Lens: Once frozen, remove the block from the freezer. Run the outside of the container under warm water to loosen the ice. It should slip out easily. Don’t use body heat or your hands as it might melt and cloud the surface of the ice.
- Magnify!: Take your ice lens outside on a sunny day or use a flashlight inside. Hold the ice lens over the object or text you want to magnify. Adjust the distance between the ice and the object until you see it magnified.
- Explore and Learn: Discuss how the ice bends the light (refraction) to magnify the object beneath it. You could add a nice lesson here about how magnifying glasses work and compare it to your ice creation.
- Document Your Findings: Don’t forget to take photos or record a video.
4. Snow Volcano
Transform a chilly afternoon into an explosive learning opportunity with this fun experiment. The Snow Volcano is a classic example of cool experiments that combine a winter theme with a dramatic chemical reaction.
Perfect for elementary kids or anyone looking to add a little science education to their winter fun!
What You’ll Need:
- Fresh snow
- A small bottle or a cup (This will be the volcano’s ‘chamber’)
- Baking soda
- Vinegar
- Food coloring (red or orange for a lava-like effect)
- A spoon
- Optional: Dish soap to add more foam to your eruption
Instructions:
- Build Your Volcano: Find a spot where the snow is piled high to form a volcano.The bottle should be buried in the snow, leaving only the opening at the top exposed.
- Prepare the ‘Magma Chamber’: Fill the bottle or cup about one-third full with baking soda. For an added effect, mix in a squirt of dish soap. This will make your eruption even foamier, mimicking much water vapor being released in a real volcanic eruption.
- Color Your Lava: In a separate container, mix vinegar with a few drops of food coloring. The red or orange will give it that classic lava look. Maddie Gilmartin might remind us on her YouTube channel that the color is just for show—the real magic happens with the reaction!
- Eruption Time: When you’re ready for your volcanic display, pour the colored vinegar into the bottle and stand back. The mixture will react with the baking soda, causing a bubbling eruption that flows down the snowy sides of your volcano.
- Observe the Reaction: As the volcano erupts, take this as a teachable moment to explain the chemical reactions happening. The baking soda (a base) reacts with the vinegar (an acid) to create carbon dioxide gas, which causes the bubbling and ‘eruption’.
- Capture the Moment: This is a wonderful opportunity to snap some photos or record a video for your social media or YouTube channel. Show your audience how you can create your own snowstorm of fun with just a few household ingredients.
- Clean Up: After the fun is over, it’s easy to clean up—just let the snow melt. But before that, why not enjoy a warm cup of hot chocolate and discuss what other types of science activities you can do with snow?
5. Instant Snow: The Boiling Water and Freezing Air Experiment
Turn boiling water into a cloud of ice crystals with this dramatic winter weather experiment. It’s a fantastic demonstration of the effects of extreme cold on hot water, but safety is paramount. Only attempt this with proper precautions and adult supervision.
What You’ll Need:
- Boiling water
- A thermos (for safety and insulation)
- Mittens or oven gloves
- Subzero temperatures (ideally colder than -25 degrees Fahrenheit)
- An open outdoor area free of people and obstacles
- Adult supervision (essential)
Instructions:
- Check the Weather: Confirm that the outside temperature is well below freezing. Meteorologist Eric Holthaus suggests that the colder the air, the more dramatic the effect, but always prioritize safety over spectacle.
- Prepare the Water: Boil water and carefully pour it into a thermos. The thermos will keep the water hot while you prepare to go outside and will also reduce the risk of burns.
- Dress for Safety: Ensure that everyone involved is wearing protective gear such as mittens or oven gloves to protect from the heat of the water. Make sure there’s no skin exposed to the extreme cold, which can cause frostbite.
- Choose the Right Spot: Select an open area where the wind is calm to prevent the hot water from blowing back onto anyone. Stand clear of buildings, trees, and especially people.
- Toss the Water: With an adult handling the thermos, quickly but carefully throw the boiling water into the air, aiming away from any people. The water should evaporate and then freeze before it hits the ground, creating a cloud of ice crystals.
- Observe from a Distance: Make sure everyone stands back to observe the effect. The transformation from liquid to a mist of ice should be instantaneous.
- Discuss the Science: Explain that the boiling water is so hot that when it hits the much colder air, it undergoes a rapid phase change—evaporating and then freezing almost instantly.
- Safety Recap: After the experiment, it’s a good time to recap the importance of safety when conducting such experiments. Discuss what precautions were taken and why they are important.
- Clean Up: There’s no real clean-up involved, but it’s crucial to get everyone back inside to a warm environment promptly to avoid prolonged exposure to the cold.
This experiment is a dazzling way to enjoy the winter experiments, but it should never be taken lightly. Always prioritize safety, and never attempt this in mild or warm weather conditions, as the water won’t evaporate and freeze properly, which could lead to injury from hot water. Enjoy your icy adventure safely!
6. Sub-Zero Slushies
Combine a sweet treat with a science lesson on freezing points.
What You’ll Need:
- Snow (clean and fresh)
- Your favorite juice
- Cups
- Spoons
Instructions:
- Gather Snow: Fill a cup with fresh snow.
- Add Juice: Pour juice over the snow until it’s just saturated.
- Mix and Freeze: Stir the mixture and watch as it turns into a slushy consistency.
- Taste and Talk: Enjoy the homemade slushy while discussing how the juice’s sugar content affects the freezing point of the snow, making it a slush instead of an ice block.
7. Frosty Patterns: Saltwater Art
Create a masterpiece with winter’s touch using salt, water, and cardboard.
What You’ll Need:
- Cardboard
- Water
- Table salt
- Paintbrush
Instructions:
- Prepare Your Canvas: Cut a piece of cardboard into any shape you like.
- Mix Your ‘Paint’: Dissolve a generous amount of salt in water to create a saturated solution.
- Create Your Art: Use the paintbrush to make designs on the cardboard with the saltwater solution.
- Watch It Freeze: Leave the cardboard outside in freezing temperatures. As the water freezes, salt will lower the freezing point, creating intricate frosty patterns where the solution was painted.
- Discuss the Science: Talk about how salt affects the freezing process, disrupting the formation of ice crystals and creating unique patterns.
8. Ice Fishing: Saltwater Meltdown
Teach kids about the melting and refreezing process with this simple and fun experiment.
What You’ll Need:
- Ice cubes or a slab of ice
- Table salt
- A piece of string
- A flat surface that can get wet
Instructions:
- Lay the Ice: Place your ice cubes or slab on the flat surface.
- Prepare Your ‘Fishing Line’: Lay the string across the ice.
- Salt It: Sprinkle a generous amount of salt over the ice and string.
- Observe the Catch: Watch as the salt lowers the freezing point and melts the ice under the string. After a few minutes, the ice will refreeze around the string.
- Lift and Learn: Gently pull up the string to ‘catch’ your piece of ice and discuss how a simple chemical reaction can change the state of water.
9. Snow Density Test: A Study of Compactness
This experiment offers a hands-on experience with the concept of density.
What You’ll Need:
- Various containers (cups, bowls, boxes)
- Fresh snow
- Scale (optional)
Instructions:
- Gather Containers: Select containers of different sizes and shapes.
- Pack the Snow: Fill each container with snow, pressing down firmly to pack it as tightly as possible.
- Freeze It: Leave the containers outside in freezing temperatures or place them in a freezer.
- Compare Density: Once frozen, remove the snow blocks and observe which is the hardest. Weigh them if a scale is available.
- Discuss Density: Use this as a teaching moment about how the arrangement of molecules affects the density and hardness of the packed snow.
10. Homemade Thermometer
Create your own thermometer and observe how liquid expands and contracts with temperature changes.
What You’ll Need:
- Rubbing alcohol
- Clear plastic bottle
- Food coloring
- Clear straw
- Modeling clay or playdough
Instructions:
- Mix Your ‘Mercury’: Fill the bottle a quarter of the way with equal parts of rubbing alcohol and water. Add a few drops of food coloring.
- Assemble the Thermometer: Insert the straw into the bottle but don’t let it touch the bottom. Seal the bottle’s neck with clay around the straw.
- Test It Out: Place the bottle in warm water or hold it in your hands. Watch as the colored liquid moves up the straw with the change in temperature.
- Learn About Thermal Expansion: Discuss how the molecules in the liquid move apart as they warm up, causing the liquid to expand and rise.
11. Crystal Snowflakes
Grow your own sparkling snowflakes with a simple solution and a little patience.
What You’ll Need:
- White pipe cleaners
- Borax laundry booster
- Boiling water
- Wide-mouth jar or vase
- Pencil or stick
- String
Instructions:
- Shape Your Snowflake: Twist pipe cleaners into a snowflake shape. Make sure it fits inside your jar without touching the sides.
- Prepare the Solution: Mix borax into boiling water one tablespoon at a time until it stops dissolving, creating a saturated solution.
- Suspend the Snowflake: Tie the snowflake to a pencil with string and lay the pencil across the jar so the snowflake hangs freely in the borax solution.
- Let It Grow: Leave the jar overnight. As the water cools, borax will form crystals on the pipe cleaner, creating a sparkling snowflake.
- Discuss Crystallization: Explain how the crystals form as the solution cools and the water evaporates, leaving borax behind to solidify in a crystalline structure.
Wasn’t that a blast?
Our little adventure into snow science experiments just goes to show that with a bit of snow and a few ideas, you can have a whole lot of fun.
These easy experiments are the perfect way to laugh, learn, and maybe make a mess (just a little one, promise).
So, the next time you’re looking at a blanket of snow, think of all the cool science fun just waiting for you.
Until then, keep it frosty, friends!
Related Posts:
100 Easy Science Experiments For Kids To Do At Home
50 Mind-Blowing Fourth Grade Science Experiments
25 Best Science Books For Your 1st Grader
100 Science Trivia Questions For Kids
Calie Herbst
In 2013, Calie Herbst, a former teacher with three little ones, saw a need for a “One Stop Shop” for family fun in Milwaukee. So she founded Milwaukee With Kids. Her goal was to find the best this city has to offer families and share it with other parents. In one place. In 2019, she published "Exploring Milwaukee With Kids", a comprehensive Milwaukee travel guide for families and kids. She appears regularly on WISN News, Fox 6's 'Real Milwaukee', B93.3, and Wisconsin Morning News. She has been featured in Medium, the Milwaukee Journal Sentinel, NPR, the Wisconsin Jewish Chronicle, and on CBS 58 News. Calie is available for hosting, moderating and media appearances.


